Lacerte/ProSeries Export Help
With Lacerte (also known as Intuit and ProSeries) discontinued, you're probably looking for an easy way to get your client data out of Lacerte and into a new system that will preserve all of your original Lacerte clients with their folder layout and files.
FileCenter, the award-winning document management system, can cleanly import all of your Lacerte data, showing your Lacerte clients in an electronic file cabinet, preserving all of the original folders and files.
Once you've migrated your clients into FileCenter, you will pick up right where you left off with Lacerte, still printing PDFs from Lacerte and saving them to your clients, but adding many, many more features than you had before.
This guide will help you get your data out of Lacerte and into FileCenter.
Download the FileCenter Trial »
Does FileCenter integrate with Lacerte Tax Software?
Can I bring my Lacerte clients into FileCenter?
Can I still print PDFs from Lacerte to my client folders?
Yes, yes, and yes. FileCenter integrates seamlessly with Lacerte so that PDFs will save under your clients. FileCenter also includes its own PDF printer so you can store anything as a PDF.
FileCenter even goes a step further. It lets you store any file from almost any program. Do you want to save Word documents or Excel spreadsheets in your client folders? FileCenter integrates with those programs too ... and hundreds of others. Learn More »
Step 1: Export Your Lacerte/ProSeries Data
In Lacerte (or ProSeries; going forward, we'll only refer to Lacerte, but the instructions apply equally to ProSeries), go to the File menu. There you'll see an Export option. Select it.
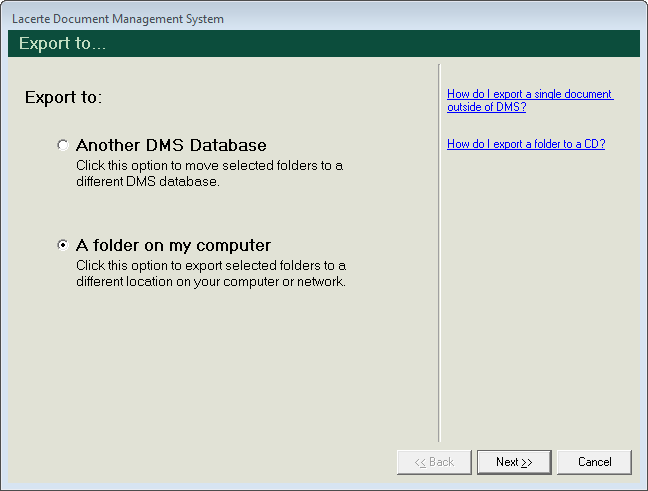
Now you'e going to see a window called Export To. Choose A Folder on My Computer, like so, then click Next:
Next you'll see an option to Select Destination Folder:
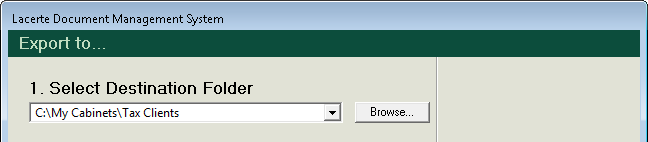
This is an important option. You need to select the folder where you want your data to reside. This can be any folder. In the example, we show "C:\My Cabinets\Tax Clients". If you don't know where to put your data, put it there.
Next you need to choose which clients to export. Select Clients as the Folder Type, and All Clients as the Filter:

Now you'll see a list of your clients. You need to select the clients you want to export. Here's how to do multiple clients at once:
- Click the first client you want to export
- Scroll down until you see the last client you want to export
- Hold down your Shift key while you click the last client
- This will select all of the clients in the range
Now click Next to begin the export.
TIP: If you have a lot of clients, you may want to export them in chunks. For example, do all of the clients from A-D, then E-H, then I-L, etc. Just make sure that you export into the same folder every time.
Step 2: Set Up FileCenter
If you don't already have FileCenter on your computer, please install the free 15-day trial:
Download the FileCenter Trial »
When you run FileCenter the first time, you'll go through the Setup Wizard. When prompted, be sure to turn on the SaveAs Dialogs:
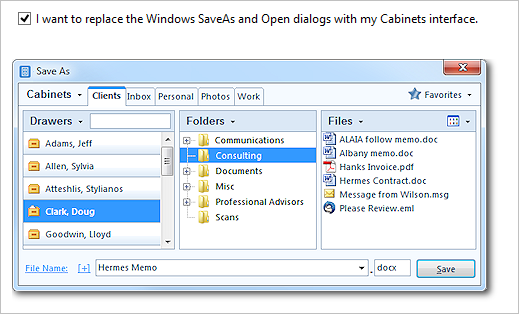
(TIP: You can also do this in the settings. Go to FileCenter's Settings > Save/Open Dialogs and select Enable custom SaveAs & Open Dialogs)
Once FileCenter's installed, it's very easy to bring in your client info. First click the Cabinets button on the main toolbar:

This will bring up a window where you manage your cabinets. Click Add. You'll see this window:

First, give the new cabinet a name, like Tax Clients. The name you choose doesn't matter.
The important setting is the Cabinet Location. You need to set this to the folder where you exported your Lacerte data. In our example, we set it to "C:\My Cabinets\Tax Clients", but you'll want to set yours to the folder you used above.
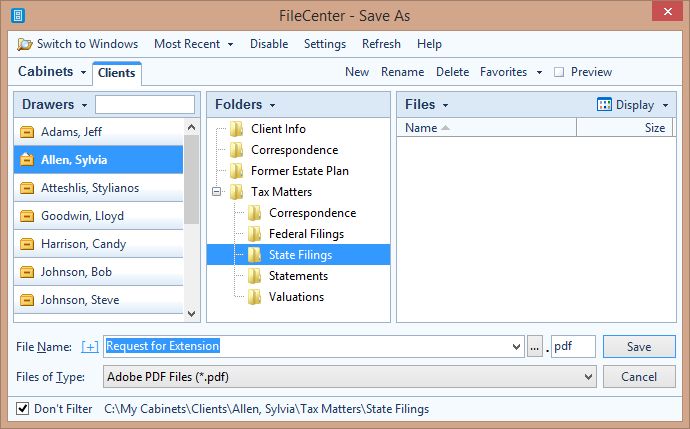
That's it. Now click OK. You'll go back the main interface where you'll see all of your Lacerte data. The clients show up in drawers on the left. Clicking on a drawer will show the client's folders in the middle and files on the right.
At this point, you'll want to watch some of the videos from our tutorial library to learn the ins and outs of FileCenter: How-To Video Library »
Step 3: Start Saving Lacerte PDFs to FileCenter!
Now let's show you how to save Lacerte PDFs into client drawers in FileCenter.
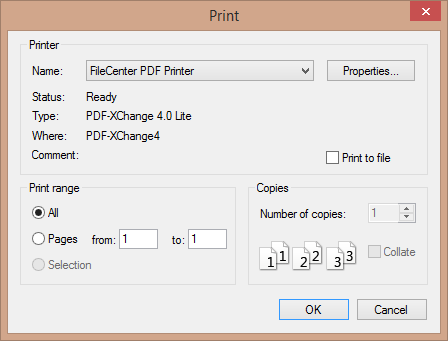
Go into Lacerte and produce a report as usual. When you print it, select the FileCenter PDF Printer:
You'll then be asked where you want to save the PDF:
(TIP: If you don't see your cabinets when it's time to save, go to FileCenter's Settings > Save/Open Dialogs and select Enable custom SaveAs & Open Dialogs)